


This document contains information related to the installation and execution of the CallCabinet module function, referred to as the ccmodule. This guide and the referenced files are targeted for installation on Elastix-FreePbx system on a Centos 7 machine.
Prerequisites:
-
- Confirm Python version (Version 2.6 or higher)
python -v

or

python --version
Files/Directories required:
- CCModule: executable binary that provides the main process and worker thread to encrypt and transfer files contained in the CallCabinet file repository. (please contact helpdesk of your CallCabinet representative for the file).
- ccinitd: init.d shell script needed to run the ccmodule on system startup (if required).
- /home/callcabinet: directory for scripts, executables, configuration files, log files and files related to the execution of the ccmodule.
- CCconfig.txt configuration file containing the configuration data for the ccmodule. This file will be automatically created on first run of the ccmodule.
Installation Steps (Root privileges are required):
- Register to create an CallCabinet account for Queuemetrics by visiting https://app.callcabinet.com/Account/Register?d=loway Note: Using any other registration URL will not create an account that will work with Queuemetrics.
- You need to use Asterisk post call scripting (Click here for instructions on Asterisk or Click here for FreePBX) to rename the system generated recording to a usable filename that contains the relevant META data (the file should ideally be recorded as a GSM encoded WAV file)
- Create the repository directory “/home/callcabinet” for use by the ccmodule
- Ensure that the moverec.sh or moverecfreepbx.sh script is executable by the asterisk user.
- Ensure that the /home/callcabinet/recordings folder has permissions for the asterisk user
chmod -R asterisk:asterisk /home/callcabinet/recordings - Make sure you have the latest CCModule Daemon (please contact helpdesk or your CallCabinet representative for the file).
- Install Sox library.
sudo yum install sox (for CentOS)

sudo apt-get install sox (for Debian / Ubuntu) - Copy the CCModule to the CallCabinet directory:
mv /usr/local/pbx/cc/64bit20160622 /home/callcabinet/ - Set permissions on the ccmodule:
chmod +x ./64bit20160622 - Run the ccmodule:
nohup ./64bit20160622 >a.out& - Note: On first run the command will terminate because the newly created CCconfig.txt does not have a CustomerID or SiteID.
- Confirm that the CCconfig.txt file has been created, if not please check the a.out file for any possible errors.
- Edit CCconfig.txt and insert the relevant CustomerID and SiteID into the first 2 lines (These IDs are obtained during the CallCabinet registration process (see installation step 1). (For Multi-tenant deployments please see notes below).
vi CCconfig.txt - Edit the CCconfig.txt and set the following parameters (the keys should already exist):
CustomerID:<Received in the Registration Process>
SiteID:<Received in the Registration Process>
FileNameDelimiter:<_>
FileNamePos1:<DateTime>
FileNamePos2:<Duration>
FileNamePos3:<Direction>
FileNamePos4:<Number>
FileNamePos5:<Ext>
FileNamePos6:<CustomerInternalRef>
Treesupport:<yes> - Run the module. NOTE this command will ensure that the module persists, to ensure it restarts if the server reboots please add it to the start-up config.
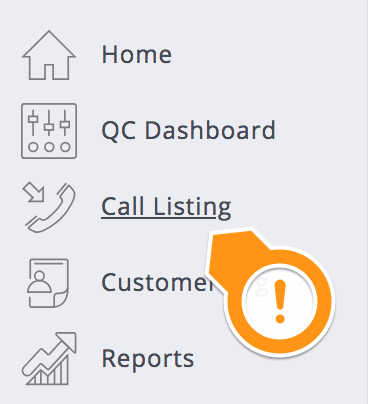
nohup ./64bit20160622 >a.out& - If successful you should be able to log into your CallCabinet account (created in Step 1), click on the Call Listing menu icon and you should now see the recorded calls beginning to appear.
Notes: Make sure the files are in /home/callcabinet and the recordings are in /home/callcabinet/recordings (or other location specified using the Repository setting in CCconfig.
QueueMetrics Setup:
To make sure QueueMetrics looks for your recordings on your CallCabinet online repository, you need only three things:
Your CallCabinetForQm Customer ID (CustomerID). Your CallCabinetForQm Site ID (SiteID) and a valid CallCabinetForQm API Key which are sent when you created and activated the account in Step1.
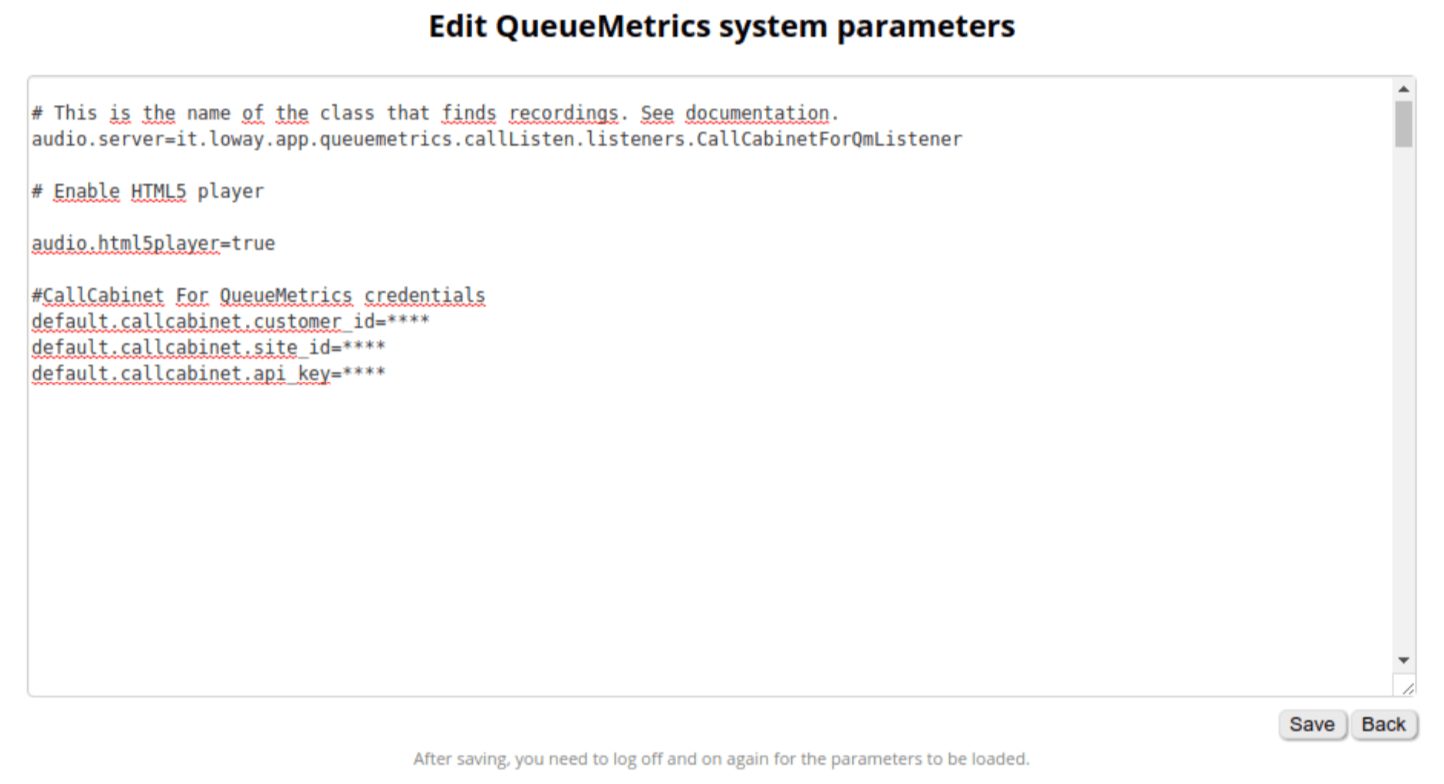
Once we have all of the above information, from QueueMetrics homepage we must go to Edit System Parameters and edit the following parameters:
audio.server=it.loway.app.queuemetrics.callListen.listeners.CallCabinetForQmListener
default.callcabinet.customer_id=****
default.callcabinet.site_id=****
default.callcabinet.api_key=****
audio.html5player=true
Make sure you replace the ** characters with your Customer ID, Site ID and API Key. The audio.html5player=true parameter instead, enables us to listen to the recordings directly on our browser.
We should be ready now, let’s go back to the HomePage and take a look at any report containing some of the calls that we recorded.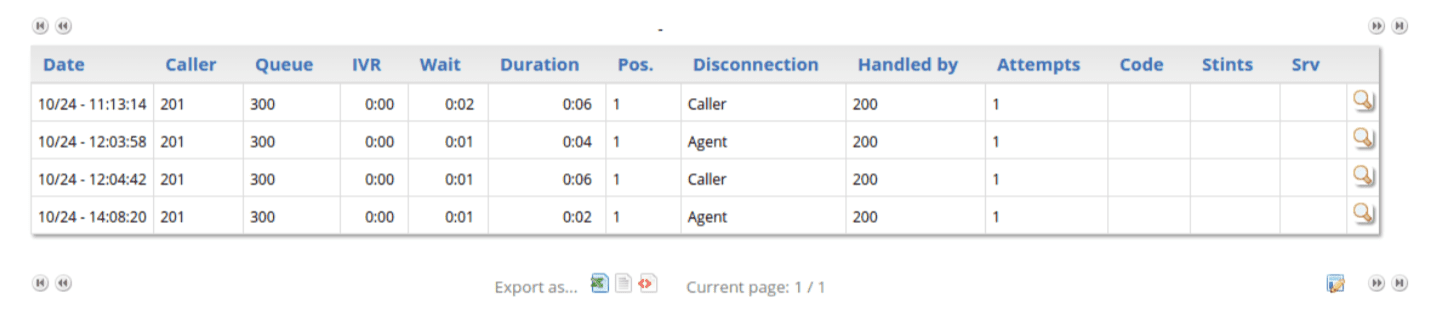
If we click on the Call Detail Icon (the magnifying glass icon on the right), we can see at the bottom that QueueMetrics retrieves the recordings related to that call’s Call ID.
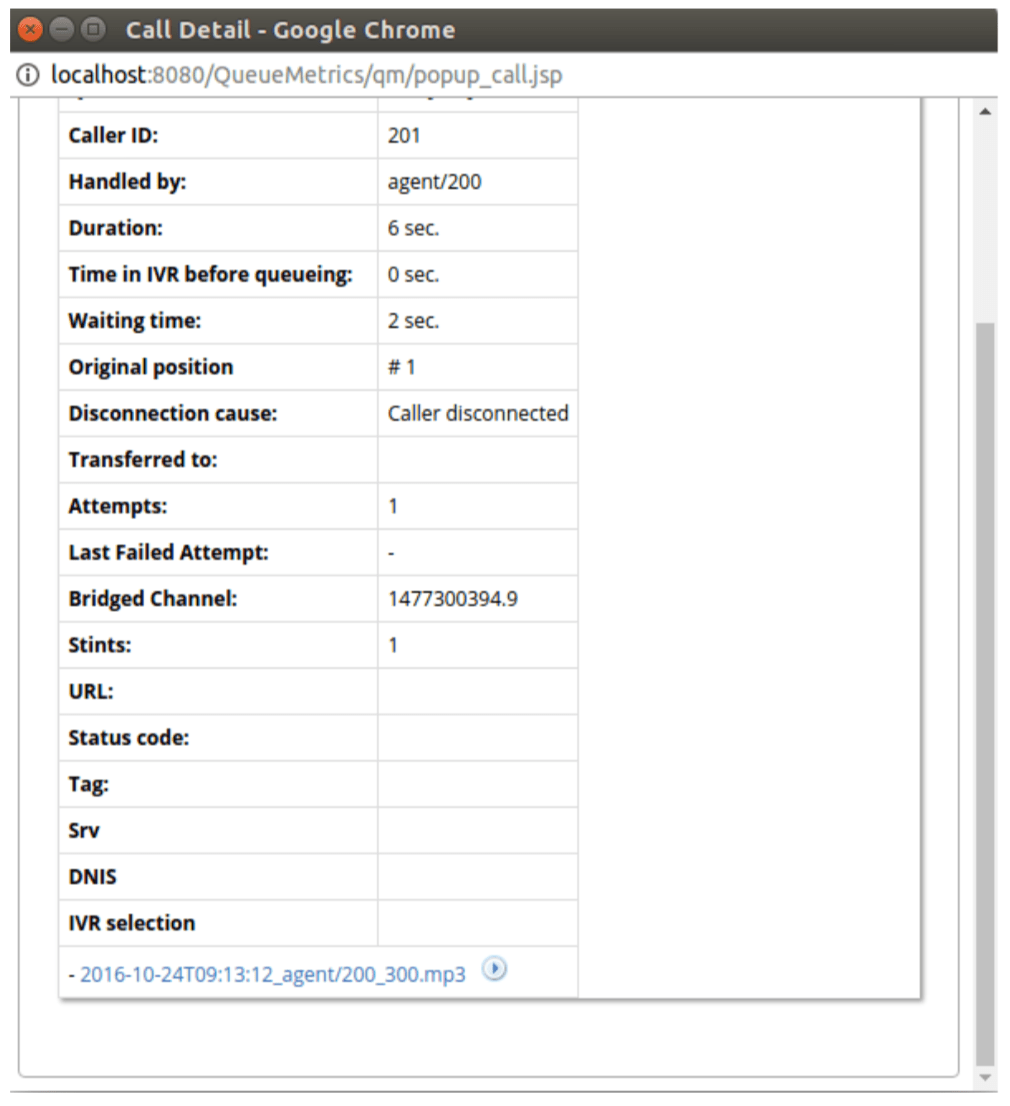
The name format QueueMetrics uses to represent a recording is the following:
DateTime_agent_queue.mp3
If we click on the Play icon just right of the recording name we can stream the recording securely without downloading it.
To download it instead, we can click on the recording name.

Recording Outbound Calls
The moverec.sh (moverecfreepbx.sh)script that is used to move the recordings to the staging folder, is able to recognize if the recorded calls are inbound or outbound calls. In order to distinguish between the two, we must save outbound call recordings in a different location than we do with inbound recordings.
The location we need to save outbound recordings to, is the /var/spool/asterisk/monitor/temp folder.
In order to do this, we will customize the part of QueueMetrics dialplan that allows agents to make outbound calls from the agent page.
Go to /etc/asterisk/extensions_queuemetrics.conf
Scroll down until you reach extension 28 (agent custom dial), and replace it with the following:
; extension 28: agent custom dial
exten => 28,1,Answer
exten => 28,n,NoOp( “QM: Agent Custom Dial. Dialing ${EXTTODIAL} on queue ${OUTQUEUE} made by ‘${QM_LOGIN}'” )
exten => 28,n,Set(QDIALER_QUEUE=${OUTQUEUE})
exten => 28,n,Set(QDIALER_NUMBER=${EXTTODIAL})
exten => 28,n,Set(QDIALER_AGENT=Agent/${AGENTCODE})
exten => 28,n,Set(QDIALER_CHANNEL=SIP/${QDIALER_NUMBER})
exten => 28,n,Set(QueueName=${QDIALER_QUEUE})
exten => 28,n,Set(CALLFILENAME=${STRFTIME(${EPOCH},,%Y%m%d-%H%M%S)}-OUT-${QDIALER_NUMBER}-${AGENTCODE}-${UNIQUEI
;This is where we set the folder to be the “temp folder”
exten => 28,n,MixMonitor(/var/spool/asterisk/monitor/temp/${CALLFILENAME}.${MIXMON_FORMAT},b,${MIXMON_POST})
exten => 28,n,Goto(qm-queuedial,s,1)
exten => 28,n,Hangup
Now, after reloading Asterisk’s dialplan, we will find that our outbound calls are also being recorded and moved to the staging folder correctly. They will then be uploaded to your CallCabinet For QueueMetrics account.
Multi-Tenant Call Recording
QueueMetrics and CallCabinet both offer support for Multi-Site configurations, where the same customer has the need to monitor different PBXs with the need to differentiate between recorded files.
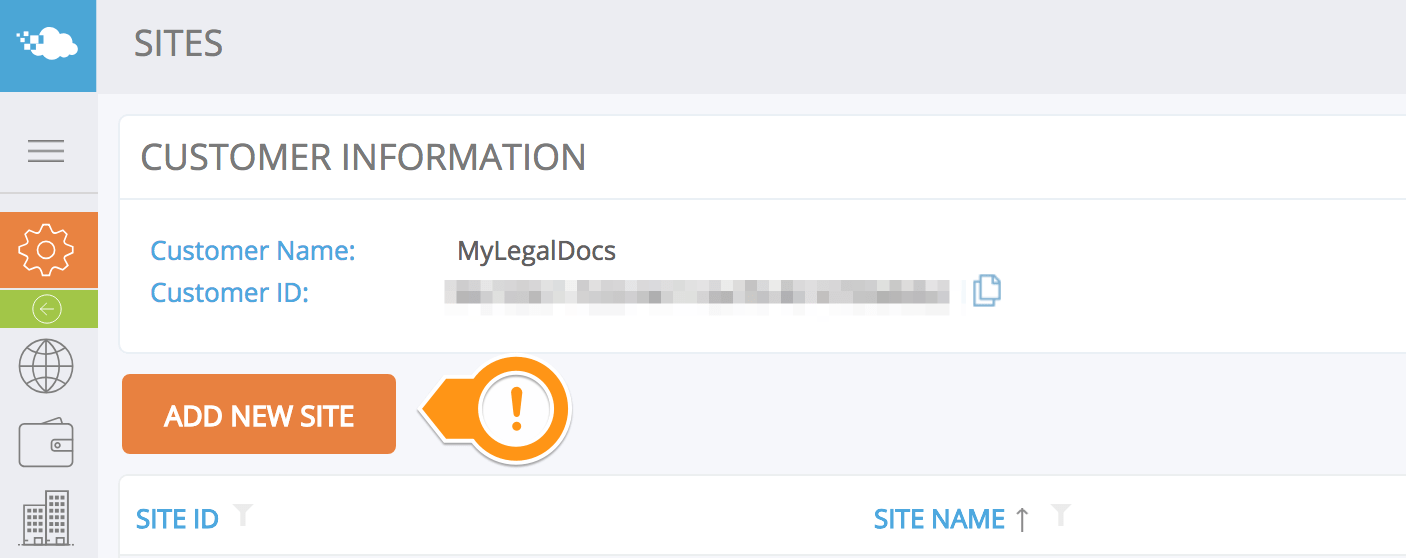
In CallCabinet, this is simply arranged by logging in the CallCabinet HomePage then going to Settings -> Site -> Add New Site. This will provide you with a different Site ID that will be used to access stored data coming from the New Site. Doing this, will provide you with a different Site ID that will be used to access stored data coming from the New Site.
On the QueueMetrics side instead, we find the Cluster Functionality that is meant to allow the user to monitor different PBXs through the same QueueMetrics System.
In order to setup the Cluster Functionality correctly please refer to the QueueMetrics Manual.
http://manuals.loway.ch/QM_UserManual-chunked/ch20.html
Clusters allow the user to define different System Parameters for different PBXs, let’s take a look at how it would work in a situation where we have two different PBXs named respectively Alice and Bob.
As we can see we will have defined, in the Edit System Parameters page, the names of the different PBX Servers, with the system property.
cluster.servers=alice|bob
Different PBX names will be separated with the “|†Pipe symbol. To define which PBX we want QueueMetrics to monitor we use the property.
default.queue_log_file=cluster:*
In this case we want QueueMetrics to monitor all of them so we use the “*†Star symbol, otherwise we could use the names of the different servers to monitor, separating them with the “|†Pipe symbol.
Now, we can define properties specific to each PBX Server, by using the following syntax:
cluster.alice.callcabinet.customer_id=****
cluster.alice.callcabinet.site_id=****
cluster.alice.callcabinet.api_key=****
So, by using the prefix cluster.ServerName.SystemParameter , where ServerName is the name of the PBX (e.g. alice ) and SystemParameter is the name of the System Property to be set (e.g. default.callcabinet.site_id , without the default. prefix), we can allow the same properties to have different values depending on the server we are currently monitoring.
After logging out and back in again, to make sure the changes to the System Parameters can take effect, we can launch a new report and take a look at the Call Details.
As we can see, now QueueMetrics populates the Srv field with the name of the PBX Server on which the call took place. If we open the the Call Details, QueueMetrics will access CallCabinet using the Site_ID, Customer_ID and Api_Key, we specified for that particular PBX Server.
For multi-tenant deployments please contact our support team for more information on your specific environment.
Troubleshooting
If the ccmodule will not start, please check the contents of a.out or nohup.out and ccmodule.log for possible errors.
For help and support please visit the CallCabinet support helpdesk by clicking here